Creating Reports |  |
Creating Reports
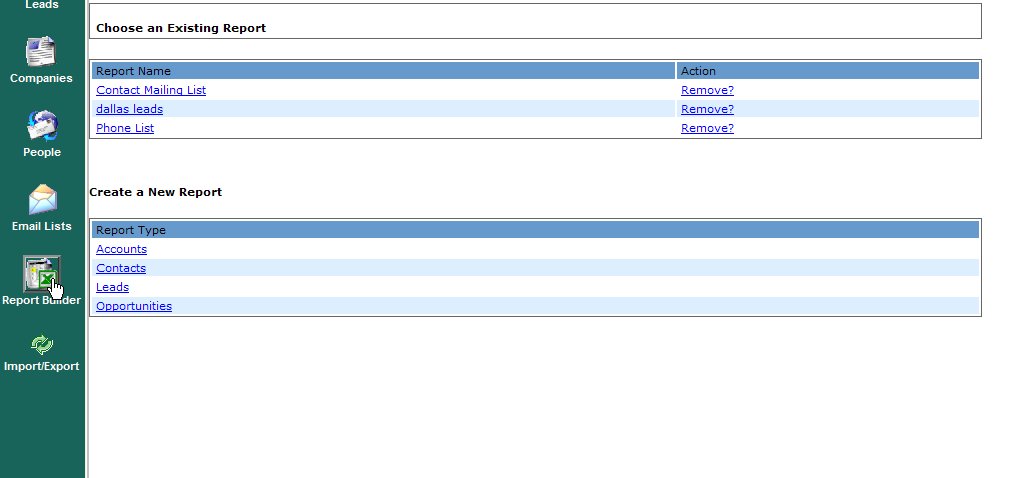
The Report Builder allows you to create and run custom reports. Reports can be displayed to the screen or exported to Excel, CSV, or XML. The main screen, shown below, contains a list of pre-defined reports and gives you the ability to create new reports.

The top portion of the screen shows existing reports. When you select an existing report, you will be taken to the report definition, which will give you the ability to modify the report prior to running it. The bottom portion of the screen gives you a list of report types that you can create
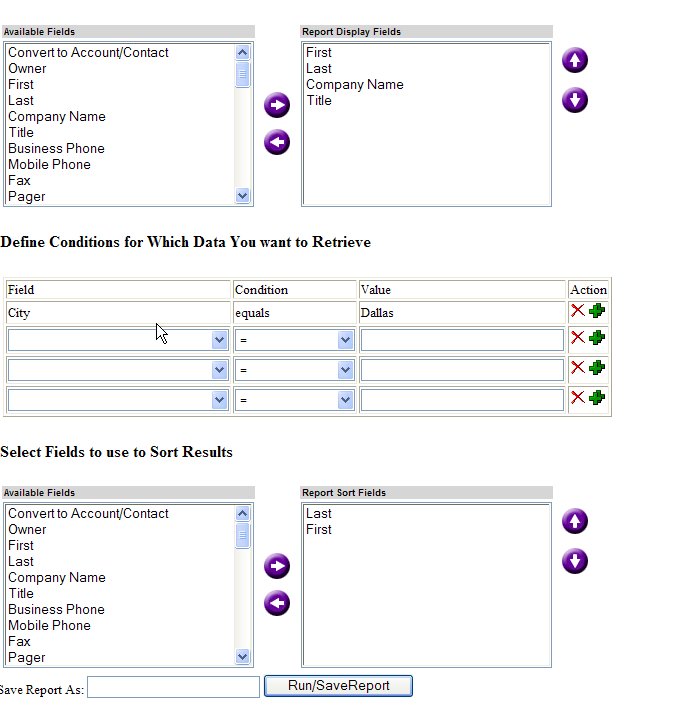
The screen below shows the report definition screen.

The report definition screen allows you to choose which fields are show in the report, what criteria will be used to retrieve data for the report, and what the sort order of the data should be.
To add fields to the report, you select fields in the "Available Fields" select box and move them to the "Report Display Fields" select box using left arrow button between the boxes. You can select multiple fields at the same time by using the CTRL and SHIFT keys. If you hold down the CTRL key, each field you click will be hilited. If you hold down the SHIFT key, all fields between the first field clicked and the last field clicked will be hilited. When you use the left arrow button all hilited fields will be moved. Similarly, you can remove fields from the report by hiliting them in the "Report Display Fields" select box and using the right arrow button to move them back to the "Available Fields" select box. You can alter the order of the fields in the report by using the up and down arrow buttons to the right of the "Report Display Fields" select box
Report Criteria are defined in the same way that you handle advanced queries. You can remove a search condition by clicking on the red "X" button in the action column. If you need to add additional conditions, you can click on the green "+" button in the action column.
The order that data is displayed in the report are defined in the "Sort" section of the screen. Adding, removing, and ordering sort columns is done in the same way that you choose the fields to display in the report.
If you want to save the report so that it can be rerun at a later date, you should enter a name in the "Save Report As" field.
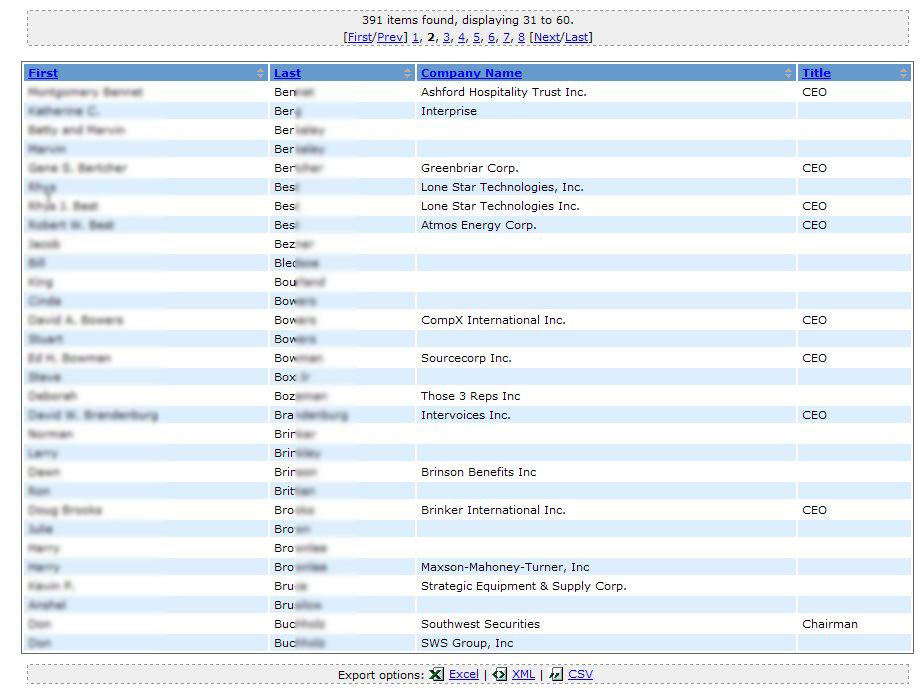
The figure below shows the report output screen

The top of the screen shows the number of records returned by the report and allows you to page thru the results. The middle portion of the screen contains the actual report results. You can dynamically alter the sort order by clicking in the column headers. The bottom portion of the screen lets you export data in Excel, XML, or CSV formats.
